Writing a blog in WordPress may seem confusing at first. But, as soon as you get the flow, publishing becomes a smooth and simple process. You can start a personal blog, create a brand, or manage posts on behalf of clients, but knowing how to correctly upload posts will save time and make your site look presentable. You will master all the critical steps in this guide: how to create your post, add pictures, establish categories, SEO, and confidently publish. Read below to know more about how to upload blog on wordpress.
Quick Table: How to Upload a Blog on WordPress
Let’s have a look at the steps briefly before reading the steps in detail:
| Steps | Description / Tip |
| Log in to your WordPress dashboard | Enter your username and password to access your site. |
| Go to Posts → Add New | Open a new post to start writing. |
| Enter your blog title | Make it clear and engaging. |
| Write your content | Add all the text for your post. |
| Add images or other media | Make your post visually appealing. |
| Set a featured image | This image represents your post on your site |
| Choose categories and tags | Organize your content for easy navigation. |
| Add a short excerpt (optional) | A brief teaser for listings or social media. |
| Preview your post | Check how it looks before publishing. |
| Save as draft, publish, or schedule | Decide when your post should go live. |
| Check that your post is live | Make sure it appears correctly on your site. |
| Share and promote your post | Spread the word on social media or other channels. |
| Edit or update later if needed | You can always make changes after publishing. |
How To Upload Blog On WordPress: Complete Steps
Below are the steps related to how to upload blog on wordpress:
1. Log In to Your WordPress Dashboard
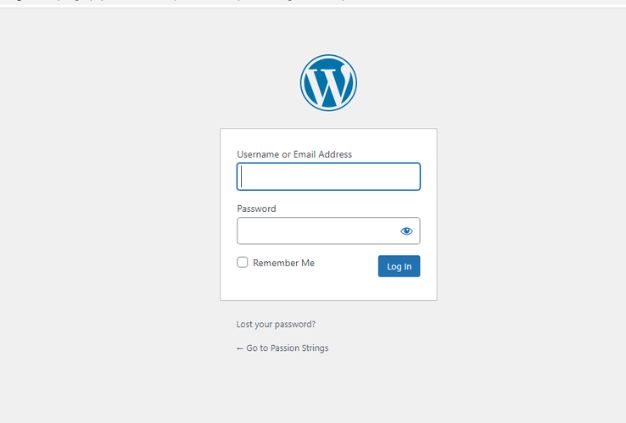
The first step on how to upload blog on WordPress is to begin by navigating to your WordPress login page,(yoursite.com/wp-admin). Enter and type your username and password, and press Log In. As soon as you get access to the website, you will be on the main dashboard, where you will have control over everything: posts, pages, media, design, and settings. Think of it as the backstage of your site. That is where you will build, edit, and control all the content to be published so that the world can see it.
2. Go to the “Posts” Section
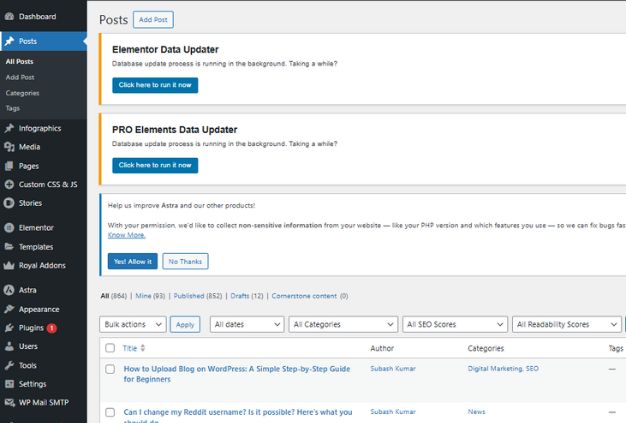
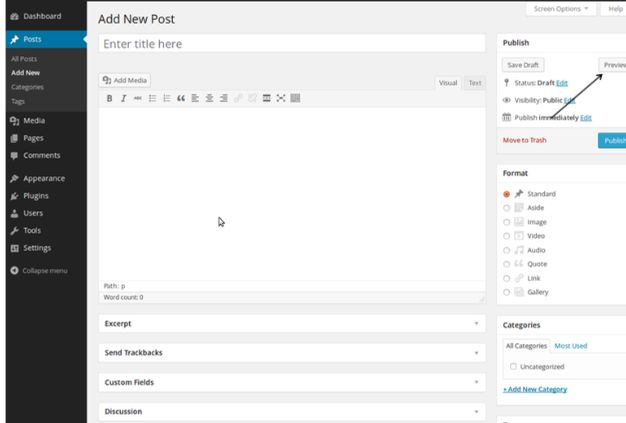
After getting into the dashboard, you need to look at the menu on the left and select Posts. This is the place where you can see all your published posts, drafts, and scheduled posts. To add something new, just click on Add New. It provides you with a blank editor in which you can create your post. Imagine this phase as entering your writing studio: blank page, clean design, and all tools immediately available to you.
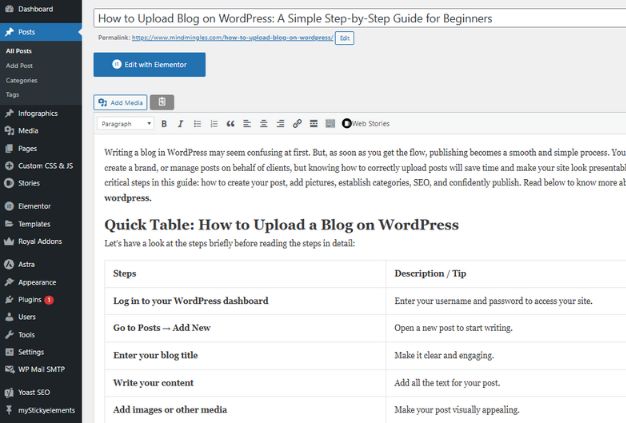
3. Add Your Blog Title

Once you have clicked the Add New button, you will find two areas: one where you will type in your title and one area where you will write all your content. Begin with a clear and interesting headline, and proceed to type or paste your blog post into the editor. You can format a text, insert headings, add links, or divide paragraphs to get a better flow. The process is all about formatting your story: to make it readable, clean, and presentable to your audience.
4. Write Your Content
The next step on how to upload your blog on WordPress is to organise your content into sections with the Gutenberg block editor. Click the “+” sign to insert whatever you require, like Paragraphs, Headings (H2, H3), Lists, Quotes, or any other block that suits your content. Keep your paragraphs short for easy reading. Use headers to help readers navigate your content. Highlight important points using bold or italics naturally. And do not forget internal or external links, these assist the readers to explore more and make your blog feel connected.
5. Add Images, Media, or Visual Elements
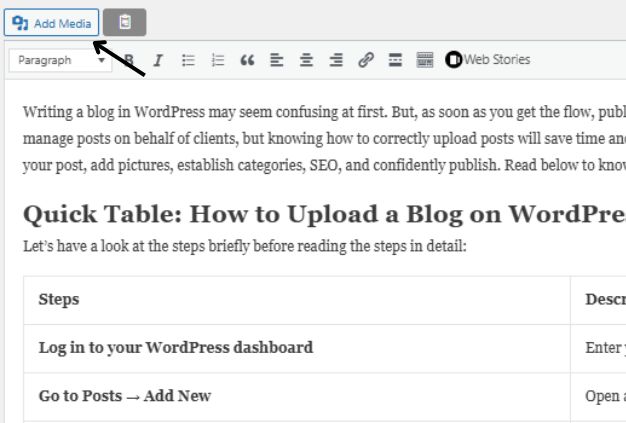
To make your blog more interesting, click the “+” block button in the editor and select Image, Gallery, Video, or any other type of media you would like to add to your post. You can either upload files from your computer or you can choose files that are already in your Media Library. Adjust alignment, size, and captions to fit your layout. This will make your content alive, converting the plain text to a post that is easy to read and pleasant to look at.
6. Set a Featured Image
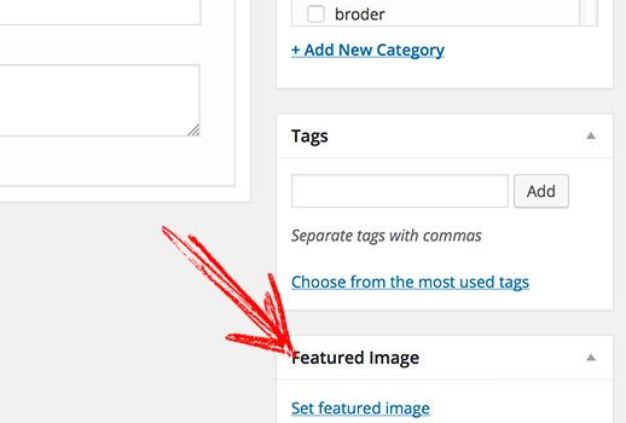
Under Post Settings (right-hand sidebar), you need to click Set featured image. Select an image that feels like home to your blog- either you can upload a new one or select one that is already in your Media Library. Also, remember to add Alt Text. This is to ensure that search engines can interpret your picture and also enhance accessibility to readers who use screen readers. This image will represent your post across your site, so choose one that is clear, relevant, and visually appealing.
7. Choose Categories & Tags
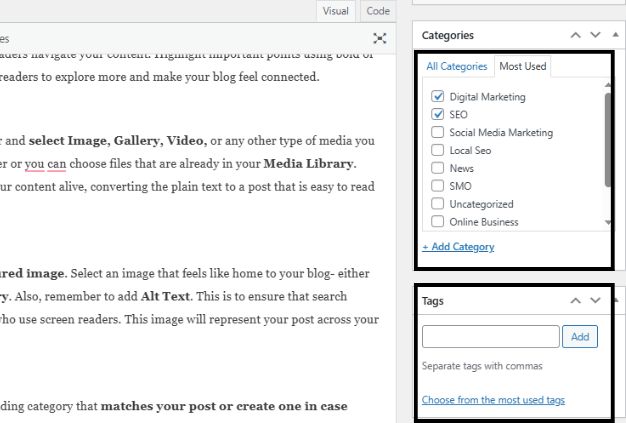
On the right sidebar, under the category section, choose the corresponding category that matches your post or create one in case necessary. This is to assist in organising your material into big themes to navigate easily. Next, scroll to Tags and add additional specific keywords about your subject. Tags are mini-labels that make the reader (and the search engines) see the details of your post. Categories and tags are used together to ensure that your blog is well organised and easy to navigate.
8. Add an Excerpt (Optional)
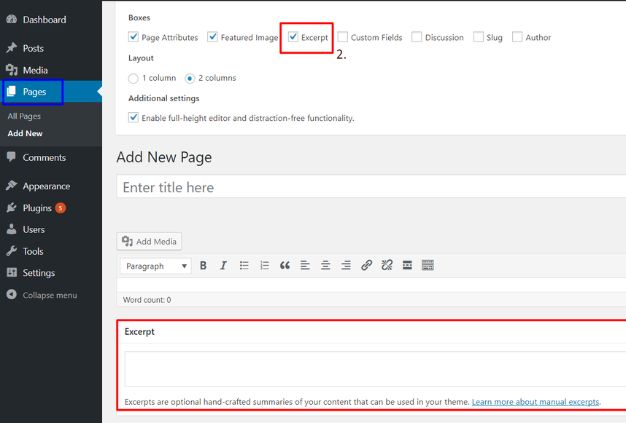
Select the post settings, scroll down to the Excerpt. Here you can write a brief, catchy overview of what your blog will be about- a teaser that will be on your blog listing page and in some cases when sharing the post on social media. Make it concise, friendly, and not more than a few lines. It is a very minor thing, but it helps the reader to realise what your post is about, and it leads to more clicks.
9. Preview Your Post
To view how your blog will appear when it is actually live, you can also do it by clicking the preview button at the upper right. Test the layout across various platforms: desktop, tablet, and mobile, to ensure that everything is readable. Quickly scan the post, check the formatting, broken links, bad spacing, or misplaced images. This is your final revision, ensuring that your work is presentable, professional, and free of errors.
10. Save, Publish, or Schedule Your Post
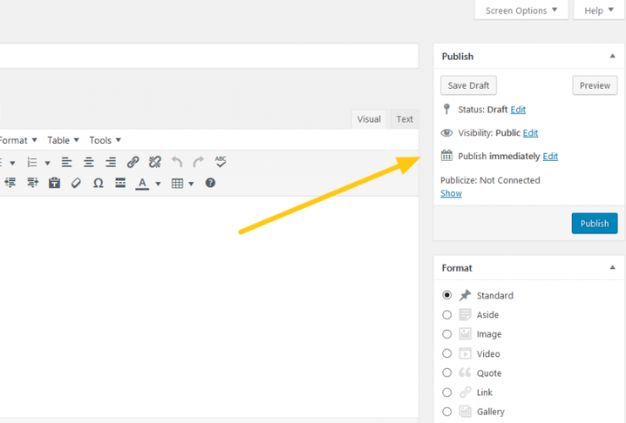
If you are still writing your blog, press on, click “Save Draft” to be able to revisit it later without losing any changes. When you are ready to make it live, press Publish and confirm your decision. Want it to go up at a specific time? Use the “Publish” settings to select a future date and time perfect for planning content. You can also choose your post’s visibility: Public for everyone, Private for you, or Password-Protected for select readers. This step gives you full control over when and how your post appears.
11. Verify Your Post Is Live
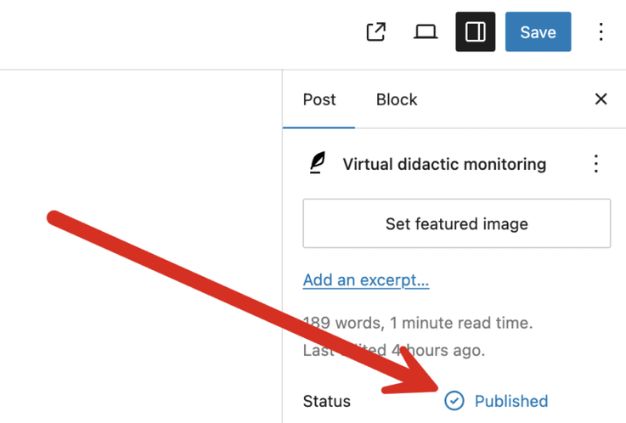
Once you publish your content, go to the home page or post listing to ensure that your post is live and formatted correctly. Check the title, the featured image, and formatting to ensure that they appear as intended. If you schedule the post later on, come back at the selected time to make sure that it is posted on its schedule and nothing goes wrong. It is a fast test to identify any glitches as soon as possible and ensure that your readers get the best of your work.
12. Promote Your Post
Once your blog post is live, you can copy the link and share it anywhere you want to increase reach. You can use SEO plugins such as Yoast SEO or Rank Math to improve your meta title, description, and keywords. This helps your post rank better on search engines. Moreover, you can also add a clear call-to-action at the end of the content by asking readers to comment, subscribe, or share.
13. Edit or Update Later
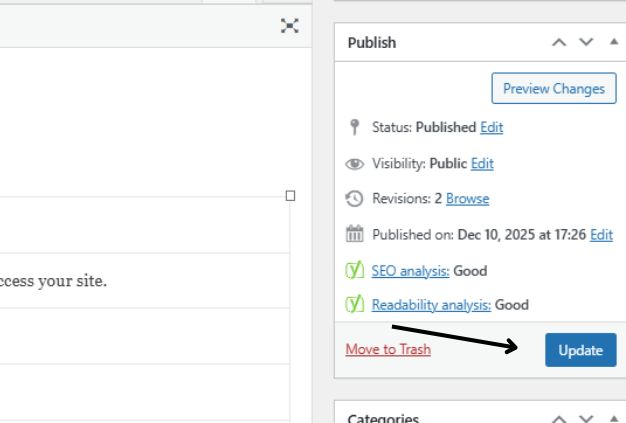
If you ever need to make changes, go to Posts → All Posts. After that, look for the blog you want to update, and click “Edit.” Moreover, you can tweak anything you want in the blog. Once you’re done, hit “Update” (or “Republish” if major changes were made) to save your improvements. You can also delete the post you want.
Conclusion
How to upload blog on WordPress is easy if you know the steps from drafting your content to adding visuals, setting categories, previewing, and finally hitting publish. WordPress allows you to have complete control over the appearance of your post, its publication date, and how it is read by your visitors. No matter what you are writing, whether it is business, passion, or personal branding, this process will allow you to publish with confidence and consistency. Practise makes the entire process natural, and you focus on what truly matters: creating valuable content your audience will enjoy and return for.
Frequently Asked Questions (FAQs)
Q1. Do I need any technical skills to publish a blog on WordPress?
No, WordPress is designed for beginners. The process of publishing a blog on WordPress is simple.
Q2. What’s the difference between a post and a page?
Posts are time-based blog entries; pages are permanent sections like About or Contact.
Q3. Why can’t I see my blog after publishing?
You should check that you did not set it to Private or Scheduled by mistake. Also, try refreshing or clearing your browser cache.
Q4. Can I edit my post after it’s published?
Yes. Go to Posts → All Posts, open the post, make changes, and click Update.
Q5. Should I use categories and tags?
Yes. It will help to organise the blog more effectively.